Showing posts with label beauty salon. Show all posts

Tuesday, 8 December 2015

I got LIP FILLERS with Amara Clinics! Before & After Photos!!! ♥

So as most of you know, I scheduled an appointment with Amara Aesthetics recently and have been so so excited. I actually wrote an introductory blog post already which let you guys know why I chose to have them done and why I chose Amara. So if you haven't read that yet, do so now - as this is the second piece of the puzzle - read here!

As well as details into why I made the decision, my last post was pretty much a giant disclaimer that I'll tip-toe across once more. By getting lip-fillers I in no way intend to push that decision on anybody else. It is a medical procedure that requires plenty of planning and 100% confidence on your part! So if it's something you're interested in learning more about, keep reading :)


While I would find myself researching various clinics and mobile nurses around the country, I would find myself asking "Am I ready?" but upon browsing through Amara's website, I'd say to myself "Yes, I am ready!" Their many testimonials, informative website and natural before & after photos had me feeling at such ease and really made me not only confident, but majorly excited in their abilities and what they might be able to do for me. Admittedly I was nervous on the few days running up to the procedure, but that was no reflection on the clinic itself - I had full faith in Dr Paul Munsanje, the Medical Director of Amara Aesthetics. They are a 100% Irish owned company and have clinics in Dublin and London!

My lips weren't something that necessarily bothered me, but I've always wished for more! I was happy with the shape of my natural lip, I just wanted a little boost. I feel that by getting them plumped up it would balance my face, as I feel my nose takes center stage - (thanks Maaa!)


As a Makeup Artist, I've seen many clients come to me with lip-fillers and so began my slight obsession with them. I'd find myself looking at people on the streets (especially on my various trips to Liverpool!) and I'd say "Look, look, she got her lips done!" That wasn't the effect I wanted to go for. I'd like somebody to look at me and say "Look, she has great lips! I wonder..." rather than the obvious duck pout that seems to be overpopulating the nation. As great as it may look on Donald & Daffy, in my personal opinion, that's not a good look - you know, the gigantic upper lip curving outwards as though it's about to do a somersault, all while maintaining the rock-hard appearance of looking "done". In fact, I'm so picky that when I arrived to the clinic, I showed Dr. Paul a photo collage I had made with everything I didn't want! Head-wrecker of a client at it's finest, but it is my face after all!

I love love love them!
Upon arriving to the gorgeous clinic on Merrion Square, Dublin, I was welcomed by Katie - the clinic's Marketing Manager and also greeted by Karolina - the Clinic Administrator and finally Siobhan - Amara's Skin Specialist who would be assisting Dr. Paul Munsanje during the procedure. In their spacious reception, I sat on the couch filling in a detailed client consultation form, which was definitely assuring. (Whenever you're going for any kind of procedure, be very wary when you're not asked to fill anything out!) After about 5 minutes of filling out the form I was ready to go. I met with Dr. Paul and he read through my form making sure I was the perfect candidate. He asked me if I had any questions or comments and knowing me, of course I did!

At the bottom of the post I've listed some frequently asked questions and tried to answer them the best I could. But first, let's get to the procedure! Dr. Paul Munsanje took some 'before' photos while giving his expertise on what was achievable. There are various types of filler that can be used for lip injections. Amara uses Juvederm! He then clearly talked me through what to expect.

While he got the solution ready, Siobhan held an ice-pack against my lip for a minute or two. At first I was thinking "Surely this isn't going to help!" but I didn't even feel the needle go into my lip! What I found funny is that I could feel the Juvederm wriggle it's way in. Upon each 5 second injection, Dr. Paul would then massage the substance into my lips to assure there were no lumps and that everything was even. I think there were six injection points altogether. I could have never predicted how easy and pain-free it would be! I was expecting to be very nervous but even as I was being injected, it is such a relaxing environment and the confidence of Dr. Paul just radiated the room so I knew that I was in the best hands for the job! Juvederm is mixed with local anesthetic to ensure that there's virtually no pain. I was asked to rate the pain out of 10 at the end of the procedure and I said it was about a 3, so you get the idea! The entire procedure went so much better than I was expecting and only took about 10 minutes in total!

Finally... My Before & After photos!

I have a little gloss on. This was taken as soon as I came home.
You can notice the teeny bruise at the bottom corner which
has now totally healed!
My lip-shape hasn't changed at all, it's just a pronounced
version of what was there before! I love them!
Well, what do you think? I didn't want a lot of product along the edge or outer corners of my lips - I really wanted to focus on the middle body of the lip making them voluptuous, yet natural, and that's exactly what I got!

As warned by Siobhan, they felt a little numb afterwards but this faded after an hour or so and eating/drinking was absolutely no problem. When I went to show my reluctant-hippy-esque-natural-beauty-is-key mother, even she said "You don't have a beak" - result! I never told my two little brothers and had them examine me to notice if anything was different; I had to tell them in the end! Amara pride themselves on a 'less is more' motto and they certainly have succeeded in that! That night they did swell and became a little tender, but nothing I couldn't handle. I woke up the next morning and the swelling had gone down completely! One week has now passed and I'm so in love with them! Now for some of your questions!

Was it sore?
As I said previously, barely! I rated it a 3 out of 10. The only thing I was really nervous about were the needles but I've had a lot of piercings and this doesn't even compare to getting your ears pierced! I couldn't even feel the needle enter my lips once, I just felt the Juvederm & local anesthetic go in - which was weird but totally bearable! The ice-pack and local anesthetic ensures the client feels minimal pain! 
My side profile has totally filed out. Excuse the dry lips!

Was there any bruising or swelling?
When I asked Dr. Munsanje how common it was to bruise he told me there's maybe a 1/10 chance or less. It obviously depends on the person's skin. I got one teeny tiny bruise on the left corner but it was so small that it wasn't noticeable whatsoever, just like a small red dot on my lip! It's now 7 days later and it's completely gone. In regards to swelling, I won't lie! They got pretty swollen the day I got them done and they were like my dream lips - hahaha! The next morning practically all swelling had gone so it didn't even last 24 hours!

What product is used?
Juvederm Volift was the product that was used in my lips. Unlike collagen-based fillers which is extracted from animals, Juvederm is hyaluronic acid-based which is naturally occuring in the skin already. It's FDA approved and has been around for about 10 years, which means it's been repeatedly tried and tested and an allergic reaction is very unlikely. Safety is really important to the guys at Amara which is a big plus from me!

How long does it last?
Juvederm Volift lasts 9-18 months so about a year, on average. This makes Amara the best value clinic that I've come across in comparison to others that only last 3-4 months. The longevity of course depends on each individual!

How much does it cost?
1ml costs €450 (which is what I got) but if you're a candidate for 2ml that's €800. Through browsing through Facebook I'd often see cheap deals being advertised by various mobile nurses and hearing friends that have gone to these places and said they now know why! If you take anything from this blog-post, please let it be to make sure you're going to the best of the business when it comes to any aesthetic treatment! It is your face after all and you can't really put a price on that!

Is it worth it?
Yes, yes, a million times yes! I am so happy with them I've been spending the last week looking in every reflection known to man! They're exactly what I wanted and I can't thank Dr. Paul Munsanje and all of the staff at Amara Clinic enough!

Oh and I don't know if this is anything to go by, but on my way home I stopped in my local green grocers and the guy working there said I looked great! Ha! That's definitely a first! 

So if you want to be complimented by your local businessmen, give Amara a shout! They're so friendly to deal with and extremely informative! I can't thank all of the staff enough! I will forever recommend them to anybody who's interested in getting any aesthetic treatment done! 

Give them a 'like' on their Facebook and for anybody who wants to see for themselves, watch Dr. Paul Munsanje's Youtube channel where he has a series of lip-filler based videos to assure the skeptical client, like me and of course you can browse their informative website too!

If you've any other questions, drop them an email info@amara.ie
Let me know if you end up booking in! 
And what do you think of my lips?
Comment below!
Martha x

Tuesday, 17 February 2015

Picking The Right Makeup Course? ♥


Makeup Artistry is an ever-growing business and it seems every second person is enrolling in night classes, full-time courses or trying their best to make it freelance. With it being such a popular industry it can be hard to know what course is right for you. I recently did a blog-post explaining what course I took and how I got on. You seemed to love it! You can read that here :)

There are many questions to ask yourself and the course providers when choosing the correct one. With full & part-time courses, workshops, masterclasses, there is so much choice and almost too much to choose from. Hopefully this post will make choosing the right course a little easier for you and hoosh you along in the right direction!


Ask Yourself: Why am I doing a Makeup Course?
That might sound like a silly question. 'To do makeup, duh!' But really, you need to know what your expectations are when you finish in order to know which course is right for you. 
Is the course best suited for..
  • Makeup Counters?
  • Freelance?
  • TV & Film?
  • Theatre?
  • Fashion Shows/Photo Shoots?
  • Special Effects?
  • Your own makeup?
  • Just for fun?
These are all questions that will probably need to be answered in order to choose the right course. Of course you can head into a course and see where it takes you. A lot of the time you'll set your mind to one thing and down the line will prefer another. That is totally okay and all a part of the journey, but the reason you should have an idea is to find the right course that specializes in that area. Short courses, workshops and masterclasses are ideal for those learning how to perfect their own makeup.

Qualifications
If you want to pursue life as a professional Makeup Artist post-study then you'll need a course that supplies the qualifications. There are tonnes of Makeup Artists out there and many of them are in fact self-taught, but you will rate a lot higher in the job-market and for clientele once you have the qualifications. This shows the client that your work is up to a certain standard. Some well known qualifications both nationally and internationally include CIBTAC, BABTAC, CIDESCO & ITECThese are just a few of the qualifications professionals have in their back-pocket. Courses will brag about the qualifications that they provide, so if you can't see them mention one on their website, it's unlikely that one is given!

Certificates
Some courses don't offer qualifications and provide a certificate of attendance with the company's name included. Generally speaking, these are for the shorter courses based on attendance rather than exams. These certificates aren't recognized internationally. The courses without any qualifications would be best-fitted for somebody learning to perfect their own makeup as it would be harder to gain a job with no qualifications and therefore no set standard to comply with.

How Long is the Course?
This is something you definitely need to know before you commit to a makeup course. With the finances involved, you don't want to waste your money if you don't have the time to be there, so make sure it fits around your schedule. Across Ireland there are now dozens of part-time makeup courses, Some popular ones would include Make Up ForeverVanityXLA College of Creative Arts and MFK Institute

Full-time courses are no doubt the best way to get as much information in as possible. They are normally a 5-day weekly commitment and require a lot of work. These are intended for students to work in the industry. Some popular ones would include Blackrock College of Further Education & Portobello Institute. To help your search, try Qualifax.

Course Fee
Most courses have hidden costs that go beyond the makeup provided. Things like portfolio materials, petrol/travel cost, one day training courses, exam fees, government levys etc. can cost a huge sum of money. This can (unfortunately) be the ultimate decider about choosing the right course, so make sure you've weighed out the payment and that nobody tries to rip you off! Be very skeptical of a lengthy part-time or full-time course to be paid cash-in-hand. You need a professional company, after all.

What are the Core Subjects?
Before enrolling in a course, you should know the core subjects of what you'll be learning. Don't join a course that has a brief description about what they offer all merged into one paragraph. You should be able to read all about the subjects offered in a clear bullet point format on their website. This is a great way to see if a company appears reputable and also if the subjects tickle your fancy!

Company
You need to know that the company you're doing your course with are reputable, professional and experienced. When considering a professional makeup course, ask them questions like...
  • How long have you been teaching makeup courses?
  • What is your success rate of students securing jobs?
  • Can I visit your premises & watch students at work?
  • Do you have references & testimonials from previous students?
  • Do you have photos of previous students work?
  • What are your terms & conditions?
  • Is there a minimum attendance required to pass?
  • Who is the instructor? Can I see their work?
  • What are your hygiene standards?
  • What is the practical - theory ratio?
That is only a small list of possible questions. A company that seems shy to answer any of those questions is unlikely to be confident in their courses and I'd advise to look elsewhere. 
Read more about what to avoid below!

What to Avoid
Avoid a course that doesn't display a course syllabus. A course that claims to be 'amazing' in the description is already appearing unprofessional. Companies that say their course will enable you to become a professional Makeup Artist but don't provide the qualifications are a no-no! They can't offer you something that they don't provide. Avoid courses that say they're training you to become a professional Makeup Artist but are also perfect for those applying their own makeup. Things like this contradict themselves as professional training is way too extensive for somebody learning how to apply their own makeup.

Workshops
Normally a one-day affair, workshops are intensive classes put together by a Makeup Artist with the purpose of helping you practice. The Makeup Artist will normally demonstrate a makeup look or talk you through your syllabus before letting you practice and guiding you along the way. This is ideal for somebody wanting to apply their own makeup correctly. 

Masterclasses

Masterclasses are a great way to learn new techniques that you may not have learned during your course. They're normally a one-day course taught by industry professionals letting you in on their tricks of the trade. Some say that these can be the most influential for those who are wanting to up their skill and learn new things. Therefore, masterclasses are often filled with both beginners and professionals in attendance. My upcoming masterclasses include a collaboration with From Matte to Metallic - March 18th, an Arabic-Inspired smokey eye class with Make Up Atelier Paris - March 25th & an exclusive Waterford masterclass, March 29th! Details on that here!

So my advice would be to apply for a full-time/lengthy part-time professional course that provide qualifications in order to work in the industry. To learn how to perfect your own makeup; do short courses, workshops and attend as many masterclasses as possible. This will also help build your skill as a professional once you've completed your course. As a professional or amateur you will realize that practice makes perfect and there is a lot that these courses don't teach you! 

I hope this post has made it a little clearer about what course is right for you. If so, please let me know! Or if you think there's anything I missed out on let me know that too! I can't begin to count the amount of times I typed the word 'course' Hahaha! Martha x

Monday, 5 January 2015

Lip Voltage REVIEW - Injection Free Plumping! ♥


Hey guys,
I'm sure most of you are aware of the number one lip plumping product on the market right now, that is 'Lip Voltage'. I've heard many mixed reviews and decided it's finally time to try it out for myself to see what the fuss is all about, and if it works for me. I received it months ago, but between a busy schedule and being repeatedly sick, my lips just haven't had the time to be beautified until now!

So, what is Lip Voltage?
Lip Voltage is by the company 'Dreamweave & Co.' It's a fast absorbing non-permanent peptide & collagen lip treatment that allows blood flow to the lips and gives them a bigger appearance. It lasts approximately 24 hours after application, so you don't have to be afraid of long term effects.

There's no clinic, no needles and no hefty price tag! 

How do you use it?
Always read the instructions properly when trying out a new product
Upon appearance, it looks like and holds like an average lip-gloss. As well as the gloss, comes 'Mix Up The Voltage' which allows you to customize your plumping effect and give it a turbo boost. Adding 1 drop will create low voltage, whereas adding 3 (max) will create the hottest & highest voltage. 'Mix Up The Voltage' comes in a little non-needle syringe, just for measuring out your amount of product. When applying the drops, dab the lip wand in and out of the tube for about one minute to ensure that the product is well & truly mixed around. Then apply!


Application
I noticed a defined lip line upon application
I used .15ml as I wasn't sure what my lips could take. I applied the product at 2:35pm and decided to note the effects minute by minute. I applied an even layer on both my top & bottom lip. 2 minutes later I felt a slight fuzziness in my top lip. By the time 5 minutes had passed my top lip was still the only fuzzy slightly warm feeling, so I decided to apply another layer to the bottom as it wasn't feeling anything. At 2:45pm my top lip started feeling super 
tingly and slightly hot. Still, my bottom lip didn't feel a thing so I decided to apply a third layer. Finally, at 2:50pm (15 minutes after initial application) both of my lips felt tingly and hot but bareable. 


Suddenly, I noticed in the mirror that my top lip was noticeably plumper and more defined around the edges. At 3:00pm I took my final photographs. The hot buzzing feeling didn't die down and only intensified. I feel it may bother some people and others it wouldn't. I didn't mind it, especially given the effects. I feel that I could have had a super intensified test-run by using the maximum product, but I wasn't sure how much my lips could handle using it for the first time, so I'll be intrigued to mix up the voltage even more next time. 

Does it hurt?
From reading multiple reviews and hearing many opinions, I believe it's all about personal pain threshold. Some people experience a certain level of pain and uncomfort, whereas others don't feel it at all. Some actually like the sensation! Whether you feel pain or not, I think that everybody will experience a little tingle. The pain level generally depends on the amount of 'Mix Up The Voltage' you use. (.1 ml - mild. .2 ml - medium. .3 ml - hot.)

Why does it hurt? (if at all)
Upon mixing in your 'Mix Up The Voltage', it increases blood flow and opens pores so the product can truly work, mimicking the effect of chilli on the lips without irritating the skin. 

How much does Lip Voltage cost?
The average retail price in Ireland for 'Lip Voltage' is €35, so don't be fooled by more expensive price-tags! 

Where can I buy Lip Voltage?
Lisa Wallace Beauty, 22 South William Street. €35
There are many stockists in the UK but here in Ireland, the plumper isn't as readily available. It is always better to buy from a reputable company than to buy a knock-off product a little cheaper from the internet. As with cosmetics and perfume, there is always going to be fake products out there that claim to be the real deal, When in fact, you're better off knowing 100% what products you're using.


Concluding Opinion (Hello0o, does it work?)
Well, you tell me! I would say yes. I have heard a few mixed reviews about the product that is 'Lip Voltage' so as you can imagine I was dying to test it myself. I am actually very satisfied with the results. I find that when used correctly and with the right amount of product, it should work for you too. I guess you'll never know until you try it for yourself!

Before & After 'Lip Volage' - Slightly different angles. Top lip noticeably bigger
Well that's it guys! I hope my review has been helpful.
Here's an idea - hashtag #lipvoltage into Instagram to see more Before & Afters! What do you think about it? Did it work for you? Let me know in the comments! Don't forget to 'like' Lisa Wallace Beauty on Facebook here to keep up with offers & giveaways! Martha xx

Tuesday, 30 December 2014

INGLOT Gel Liner & Duraline.. MUST HAVE! ♥

If there is one staple brand in my kit, it is INGLOT Cosmetics. I am so happy that I've discovered INGLOT (The brand is in capitals, I swear I'm not shouting! Haha). It's a luxury makeup brand without the designer pricetag. The eyeshadow pans are huge, highly pigmented and such good value for money. I could go on and on, but I won't... on this occasion!


I just thought I would do up a quick post for you about my pure favourites...

Gel Eyeliner #77 & Duraline


I don't think I've ever seen such a range of gel eyeliners as I have in INGLOT. They have every colour under the sun that I'm yet to experiment with, even white! They are all so creamy and multipurpose. You can use a black one for your eyeliner, a brown one for your eyebrows, a shimmery one for your eyelids, and a white one to get creative with around your eyes! Never before have I experienced a gel liner that glides on as effortlessly as INGLOT's. Oh, and it's waterproof, which means it can be used in the waterline too! It doesn't dry up as fast as the other ones I have tried, but let's be honest - they all do! Retails at €15

Sometimes you'd think 'What's the point?' but this is where 'Duraline' comes in. 'Duraline' is a liquid formula specifically designed by INGLOT to moisten eyeshadows, turning them into eyeliners and keeping gel products wet. Without it, I'd be lost! Retails at €12

I, myself, would go through a typical 'Duraline' maybe every 6 - 8 weeks, though I use it pretty much every day - multiple times a day. So for your average Joe who wouldn't be applying winged liner on a regular basis, it would last that little bit longer. Saying that, my gel eyeliners will last me anywhere from 6 months to a year, if not more. They really really do last. Now that I'm here, I use INGLOT every single day in my kit and not one of my eyeshadows has ever emptied. Really good value for money! 


To apply my wonderful INGLOT products, I use my favourite eyeliner brush - MAC Cosmetics #263 brush. Super skinny and super firm for maximum control!
I hope this was helpful!
Martha x

Don't forget to 'like' me on facebook here & INGLOT here!

Tuesday, 7 October 2014

NIMA Brush - Full Product Review!!!


Hey guys, guess who's back to blogging! I really did miss it. I have been absolutely swamped with tonnes of makeovers on a daily basis that blogging has been on the bottom of my to-do list, but now that Debs season has come and gone, I feel it's time to start bringing you guys some great product reviews on a regular basis to get you through the winter months. So sit back with a cuppa' and enjoy!

NIMA Brush are an Irish makeup brush company dedicated to Makeup Artists and lovers alike, aiming to bring you top quality products at affordable prices. And who better than to bring out a brush company than a Makeup Artist herself? Niamh Martin founded NIMA after working in the industry for over 10 years!

Okay, so let's get started. Firstly, how beautiful are these brushes? It's very rare that the word 'beautiful' would come to mind when faced with a makeup brush, but the colours of the NIMA brushes are what make their appearance so unique and girly. The copper handles are from 'The Elite Collection' whereas their duck-egg blue brushes are from their new exclusive 'The Artistic Collection' - even the name is swanky! . Another thing unique to NIMA is that none of the newer brushes are numbered, but named after girls! Already, I'm loving them!

 The Elite Collection

Round Head Kabuki (left)
I absolutely love these brushes for blending flawless foundation onto my clients skin. What's great about the round, subtle edges is that you're not left with any marks or lines on the skin, as a typical flat foundation brush would leave you. Therefore, minimal time, minimal effort.
Retails at €18.00

Flat Head Kabuki (right)
Whenever you hear the name 'Kabuki brush' this is what they're typically best known as - a flat head with an outter cone shape. A lot of my clients prefer the flat head, whereas I'm used to the rounded one. It's all about preference. This brush has a slightly bigger face compared to the round one, so will cover more surface area faster.
Retails at €18.00

Small Duo Fibre

I love Duo Fibre brushes. It does exactly what it says on the tin. They're made from multiple fibres to create the best and softest finish possible. Another thing I love about them is that they're usually great for multi-purpose use. I would personally best use NIMA's Small Duo Fibre brush for highlighting the cheekbones, tips of the nose, cupids bow, etc.

Another great use would be for concealing the under eyes, or eyeshadow blending; once all of your product has been applied upon the eye, you could blend with your small duo fibre really lightly for a flawless finish on that smokey eye! I tested this out on my Debs clients today and they almost all say "That brush is so soft!" Success!
Retails at €12.00


The Artistic Collection

The Erin 
I own a few of these babies in my kit, and more than once I've been asked by clients 'What is that brush for?' and unless you're a Makeup Artist, it can be unlikely that you're in the know. This fan brush is also multi-purpose. When I was studying in college, we were told it was to remove any excess brush hairs from the face after the makeup application - which is great. I always hate finishing a makeover, looking back at my photos and realizing that I've left my client with a hairy face! Oops! Even worse is trying to pick it off with a cotton bud or something teeny tiny. A simple swoop of the 'Erin; brush will remove any brushes without causing the client or yourself discomfort. 
Although that's what we initially learned in college, I've recently found that these fan brushes are typically used for applying highlighter. Simply dab the 'Erin' into your highlighter and gently glide it along the areas of the face you wish to highlight. A lot of my clients ask me what brushes they'd use for highlighter, I'd recommend investing in one of these. It goes on a treat!
Retails at €12.00


                                         The Tara
This is a must have in any makeup kit. Whether you prefer to use
it for contour or blush is completely up to you. I personally use a round brush for blush and stick to this fluffy angled one for contour. To use it as a contour brush, place the brush upon your cheekbones and tilt it to the side, having the longer side towards your ear. Gradually buff it down upon the cheekbones, towards your nose, adding a little product in every swoop if necessary. 

If you'd prefer to use it for blush, place it upon the apples of your cheeks, with the long side towards your nose, while gradually and gently working the product upon your cheekbones towards your ear. As I say, this is a must-have in any makeup lovers kit. 
Retails at €16.00

The Nichola

If there's anything I'm a sucker for, it's blending brushes. For some reason, I never seem to have enough. They are a staple to have as a Makeup Artist and I couldn't do my job without them. This type of blending brush is exactly up my alley. It's extremely soft and feels amazing blending upon your lid, yet it's also a little bit firm so you still have a certain level of control when applying your eyeshadow. If anybody is looking to slowly build on their brush collection, and are after a new blender - this bad boy is for you.
Retails at €12.00

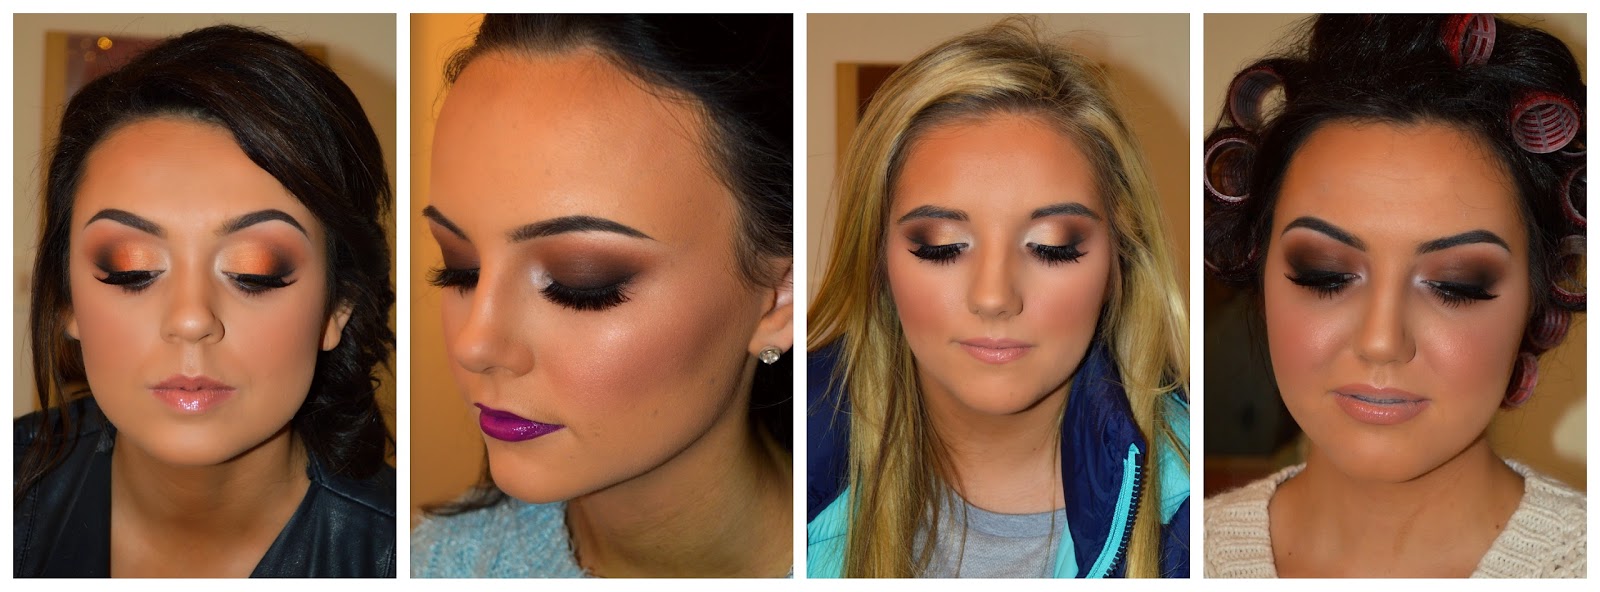
Makeup I did using the NIMA 'Nichola' brush to blend out the eyeshadow


That's it guys! I hope my review has enticed you a little to check out this great affordable brand. You can order your brushes and browse the collection here, and don't forget to like them on Facebook here too. It means so much to me to hear feedback on my reviews. Please feel free to comment beneath this post to let me know what you think, or let me know on Facebook here!