Tuesday 19 November 2013

Dry, Chapped Lips?


I love Winter for one reason... Christmas! I love getting into the season and buying everybodys presents! Butttt.. that's pretty much it. I couldn't sleep at all last night because of the freezing temperature outside, I'm clearly a Summer person! And for more than one reason... Winter is one of the worst seasons for your skin!

Three letters sum is up.. D.R.Y
Dry skin & dry lips can help nobodys appearance, especially when trying to cover it up with makeup - it really doesn't work. The best thing to do is nip it in the bud. So, today I'll be focusing on dry lips & the remedies you can take, whether you want to follow the homeopathic street or if you're just so fed up & are willing to go to the local chemist, I should have a remedy for you!

Being a Makeup Artist, about 90% of the girls lips I do are cracked and dry with little crevices in them. In saying that, mine are too - guilty! So maybe your lips get dry, maybe they crack, or maybe they get so sore & dry that they become really red & itchy around your whole mouth. Either way, dry lips aren't fun! So let's focus on what we can do to help, while also discovering some of the myths around dry lips.

How to Prevent Dry Lips? Simple!

Stay hydrated - Drink plenty of water, eat plenty of foods with water in them. Stay hydrated to prevent drying lips & skin. (Easier said than done, I hate water! Oops)

Ongoing treatment - Use a chapped-lip treatment throughout the year instead of lip balms on a daily basis. Eg; Cymex, Carmex etc.

Keep your body nourished - Water is a given. But you need to make sure your body isn't defficiant in any B vitamins, iron or essential fatty acids (along with everything else). The lack of these essential components in the body can cause dry lips!

Alternative water - If you want to be extra sure your lips will stay nice and soft all year round, apply a warm damp facecloth to your lips & hold it for up to a minute to ensure that water gets into them that way.

Avoid perfumes & fragrances hitting the lips
Throw out old lip products

Avoid sun/wind - Sounds pretty impossible, oh wait, it is! Just kidding, use a scarf in winter to cover your mouth!

Don't smoke! - You shouldn't smoke anyway. Tut tut tut.

Put suncream/sunscreen on your lips before heading out in the sun

Never lick your lips! Don't bite the dry skin off either! 
- I am so guilty of this.


Myths about Dry Lips
There are many myths about dry lips that you may not even be aware of. The first one is maybe the most common action, whether we believe it helps or not -

Lick your lips to help moisten them - eeek! What a bad idea! If you're suffering from dry lips & looking for a way out, stop right now! The unconscious belief is that licking chapped lips will make them feel better. Even though, this gives you an initial moment of brief relief, it's affecting you long term - kind of like everything else bad in the world, right? Your mouth is full of digestive enzymes & once you spread them across your lips, you're only hindering the healing process and of course spreading bacteria. As soon as the moisture is evaporated, the pain is back! So, if you're guilty of this (isn't everyone?) then try your best to STOP!

The more lip balm, the better! - FALSE. What some lip balms & most lipglosses do are keep your lips forever moist, leaving them more vulnerable to this cold frosty weather. Think of it as putting oil on your skin in the Summer, then going and lying in the sun - you're going to get burnt! Also, many lipgloss', lip balms and lip glosses contain ingredients in them that are super drying to the lips. It's better to let your lips breathe, especially in this harsh weather. If you're a lipgloss addict, try a vegan brand, with no harsh chemicals.

Vaseline is the holy grail! - Emm, no! Surprisingly, vaseline can actually not be the best thing to use on your lips. Vaseline is made from the goop that comes from oil drills, so it's something you don't want too close to your mouth as you'll ingest little bits every day. Instead, use cocoa better or Burt's Bees Balm to moisten up dry lips.

Brushing your dry lips away - Ever hear of this, brushing your lips with an old toothbrush, until all of the dry skin is gone? I've read it on plenty of blogs and heard it from 'Beauty gurus'. What astounds me is 'Do you not have any common knowledge?' Obviously this is one of the worst things you can do. If it works for you (really?), that's great. Stick with it and don't take my advice. But if it sounds as ridiculous to you as it does to me, keep reading. Not only will this be painful, but it will without a doubt worsen your condition. (Can I say duh yet?) We all know that skin cells shed. When the skin on your lips isn't ready to come off yet and you force it to do so so abrasively, it may cause opening in the lips & lead to deeper, more painful injuries! Especially if you're using toothbrushes that aren't brand new, there's a million ingredients inside toothpaste that were designed for the teeth only, but even still I'm a bit sketchy about it! Tell me, when you have a scab, the first instinct is to pick it, right? But what do we all know happens - it grows right back! If your chapped lips are really getting you down & you'd like to remove them temporarily, then what you can do is the following...

The next time you're in the shower, scrub your body etc yada yada, the last thing you should do is take a facecloth with some triple anti-biotic ointment on it (once the humidity & steam has somewhat softened your lips), and gently rub your lips with it. Not only will it be a gentle, safe exfoliant but it will also get the antibiotic ointment in there, which will helps the lips too!

Treatment of Dry Lips

Do you prefer the homeopathic route? I do too! First I'll get into a little detailed 'how-to' about masks & exfoliants etc that you can make at home, before just writing one by one the items you can use to help keep your lips soft & moist.

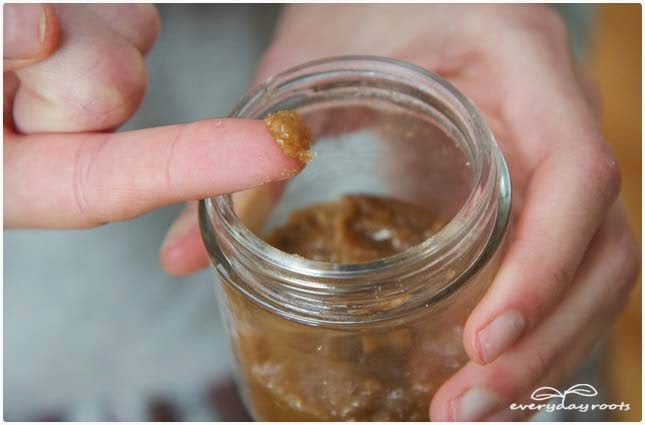
Sugar Exfoliant - Exfoliating dead skincells off your lips will help restore their natural softness faster. Mix two teaspoons of sugar with about one teaspoon of honey, until it's a thick paste. Apply the paste to your lips using your fingers, then rub it in with your index finger for about one minute. Wash it off with lukewarm water. I also like to add a teaspoon or olive oil in, too!


Honey Moisturizer - Simple! Honey is a great moisturizer which also has healing & antibacterial properties to help treat your dry lips. All you have to do is apply pure honey straight to your lips, several times a day

Rose Petal Mask - Have a rose bush in your garden? No? Better go snipping from the neighbours then! If you have some time on your hands & want to really focus on natural beauty remedies, then I'd recommend this. Wash a handful of rose petals thoroughly in water. When that's done, soak the petals in milk for a few hours - or, if you're lactose intolerant - glycerin. Mash the petals up to a thick paste. Apply to your lips two/three times a day, and/or just before bed.


Coconut Oil - Coconut oil is a natural moisturizer that can help heal chapped lips. Simply apply pure coconut oil to your lips several times a day to ensure they stay moisturized. You can buy a jar of coconut oil in any health shop, or Asian shops around town. They use it in their cooking a lot so they usually have it handy. Olive oil & mustard oil are good too.


Aloe Vera - Everybody knows.should know about the healing qualities in aloe vera. Use a gal to apply to the lips daily. It has botha  healing & soothing factor. It may not taste great but the benefits are worth it! 

Cucumber - Simply apply cucumber slices to the lips until the juice is all over them. Leave on for 15 - 20 minutes. If you do this several times a day, it should keep them nice and moisturized & it will also help them heal faster.

I'd recommend for all of these masks & exfoliants, make a big (ish) batch & store in the fridge or the press, depending. That way, you can go back whenever you like to use it whenever you need. An extra thing you can do is buy little containers of each to bring around with you in your handbag.

Then, there's...

Fish Oil Supplements
Olive Oil
Coconut Oil
Cocoa Butter
Shea Butter
Organic Beeswax
Kawa Gel
Vitamin E Oil
Vitamins B2, C, E
Use a humidifier
Caster Oil
Milk Cream
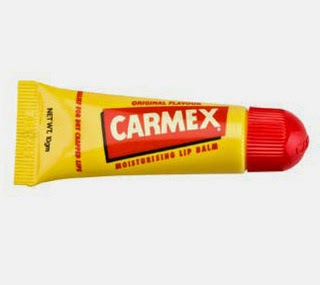
Or, if you're really not bothered, head to the chemist and try something like Cymex, something for both cold sores & dry cracked lips. It controls infection, soothes tingling & pain while preventing/healing cracked lips.

So, I hope you enjoyed my detailed blog post on Dry Lips. I put pretty much everything you need to know about prevention/myths & treatment. I hope this is helpful to you. I'm not too bothered about dry lips myself, but honestly after having all of this information laid out right here for myself, I might make a mask later on! If anybody has any further questions or suggestions, leave a comment! And don't forget to 'Like' me on Facebook - here! Hope you enjoyed! Martha xx


(All images taken from Google)

Wednesday 13 November 2013

Three Times Naked?

So, Urban Decay's Naked 3 has been confirmed to hit the shelves soon. Who's excited? I am a proud owner of Naked 2 and prefer it to the first edition by a mile! Below is a picture of Naked 1 VS Naked 2. I find Naked 2 to be a lot more wearable, I wouldn't go near the blue shades at the end of Naked 1 & I love how Naked 2 has a matte black to finish any smokey eye off.


My most used colour is definitely 'Half Baked', which is so popular it's in both! This toasty (or half toasted) golden is perfect for a base of a smokey. It fits perfectly with some blended out orange and matte brown in the corner. Below, a picture of a client who's makeup I did with 'Half Baked' as the perfect base. Her gorgeous big eyes helped the look come together too, of course!


Anyway, onto Naked 3.. & I think it's time for a sneak peak! 


The first thing you can automatically tell is the new peachy colour scheme. I'm not 100% certain on the new addition to the Naked family's release date - and although it would be a great Christmas gift (if released in Winter), I find that the colours really represent Spring & Summer more than anything. When you think of Summer makeup, you think of golden shades, you think of gorgeous peach & pink! There's not a lot of dark shades in there for any heavy Winter contouring, in my opinion. Saying that, Winter makeup is all about Sparkle, and the Naked 3 palette certainly delivers. With 9 shimmery, sparkly shades & only 3 matte - this upcoming palette is all about the bling factor!

Although it obtains lovely shades, I do find that the entire palette has the same wash of colours throughout. In saying that, I love pinky eyeshadows - I can't get enough. Especially pink sparkle, that's me to a T really. But, do I really want to buy a palette that retails at around €40 (Based on 1 & 2) that exhibits a lot of the same colours? It's a little hard to go back & forth between 1, 2 and 3 trying to compare features - so let's show all 3 together for a better, in depth, look!


Now, what I would personally LOVE to do is go into Debenhams with a little cosmetic spatula and scrape out all of that gorgeous new shade 'Dust', but I reckon that may be frowned upon...
So, going from left to right, let's talk about each shade individually!

'Strange' - It's as if 'Foxy' (Naked2) and 'Virgin' (Naked1) came together and had a baby (Hail the Virgin Irony). It was born with Foxy's matte finish, and Virgin's gorgeous colour! This is a perfect base.
'Dust' - More of a cooler pink than 'Sin' (Naked 1) and slightly lighter too. I personally am most excited about this colour.
'Burnout' - A gorgeous shimmery peach. Not really comparable to any other shade.
'Limit' - Although it's most comparable colour is Tease (Naked2), it's a lot lighter & is much more pink.
'Buzz' - Super new, super vibrant, super pink! Buzz has no competitor on the previous editions.
'Trick' - Gorgeous copper shade, this new edition can be compared to 'Chopper' (Naked2), although it is a lot more red, it's also a lot lighter than 'Toasted'. (Naked1)
'Nooner' - Definitely a similar shadow to 'Tease' (Naked2), although it appears a little more pinky and little less brown.
'Liar' - It may be compared to 'Toasted' (Naked1). Although, Liar is a lot more cool-toned compared to the gorgeous reddish tinted Toasted.
'Factory' - It's lighter than both Hustle (Naked1) and Busted. (Naked2)
'Mugshot' - Darker and cooler than Toasted (Naked1) and YDK.(Naked2)
'Darkside' - I can't find any comparable shades to this new edition - A cool toned brown with a little bit of sparkle, it appears!
'Blackheart' - Although a little comparable to Busted (Naked2), Blackheart appears much more sparkly, finishing off the new sparkly, shimmery collection nicely!

Now, hopefully that made things a little clearer. As you can see, a lot of the shadows can be compared to the previous editions - Naked 1 and Naked 2. Although, there are a lot of completely new shades to hit the collection! To conclude - It is a nice palette and I love how they're incorporating more pink. Although in my verdict, there's a little too much pink and not enough contrast! But hey, this is just my opinion. And if you love Spring-style makeup, sparkle & shimmer then this palette is definitely for you! I hope you liked my spur-of-the-moment review!

Also, please don't forget to 'Like' me on Facebook - by clicking here! Martha xx
(All photos of the palettes were taken from Google)

Monday 20 May 2013

Blonde Bombshell Look - Product list & DETAILS


Hi there! I decided to do a little blog post on this makeup look I did for Sinead on Saturday morning. I go into detail of each product I use and how. If you'd like to skip all those tips & tricks and get to the products, scroll down & I've made a little list down the bottom of all products! 

So, I received a text on late-Friday night asking to do a makeup, the next morning, for this gorgeous girl. Her Makeup Artist had called in sick, so I came to the rescue! When I get asked to do a last minute makeup job, I usually ponder for a bit, but am then persuaded because I know that it'll be worth it in the end! And this was! I've gotten great feedback with some lovely comments on this look that I uploaded onto my Makeup page (click here) Saturday afternoon.

When I see a client for the first time, I immediately analyze them (in a nice way)! I sort out in my head what foundation will work best, what colours to use etc, before of course asking them their preferences! Sinead was a happy-go-lucky client! She liked dark brows and big lips! Much easier than some odd requests I get from clients such as 'bright red eyeshadow please' and some other makeup requests that I just have to bite my lip on!

Before applying foundation, I used Smashbox Studio Finish Primer!

The foundation: MAC Studio Fix - NC35
This suited Sinead's skin perfectly with her Cocoa Brown tan on (which I'm yet to review). Studio Fix is my ultimate 'go to' foundation, and the one I use on all of my clients! It is medium - full coverage and comes in a range of colours from very pale to very dark! After applying foundation, I added some light concealer underneath the eyes and above the lid.

The concealer: MAC Conceal & Correct Palette - Light
I recently bought this concealer in London at the MAC Pro Store! I think it retails at around 35 pounds, so probably around 38 euro. I bought the light palette because it comes in 6 shades, all perfect for around the eye area. When applying concealer underneath and around the eyes, it always has to be lighter! Not white now, but a very pale pink or yellow tone, depending on the clients skin tone.

The eyebrows: Faces Cosmetics Eyeshadow - 08
Sinead had naturally thick gorgeous brows, in fact, just the day before she had gotten the infamous HD brows done! They were still a little bit red and puffy, but nothing that couldn't be concealed! The reason I do eyebrows straight after the foundation & concealer and before the powder, is because as soon as I've filled in the eyebrows, I like to go over them with a concealer brush in the same colour as the foundation all the way around the top, and a light concealer beneath them. This defines the brows and gives them a real 3D kind of look! I combed the brows with a disposable mascara wand as I applied the Faces eyeshadow with a thick angled eyebrow brush! I repeated this step in between every little application of eyeshadow, to get them very percise! After that, I did my little touchy up technique with the foundation & concealer ;) Followed by Faces Cream eyeshadow & Highlighter -> (read that section for details)

**TIP** -> (Like always, before I apply the eyeshadow, I add Kryolan Translucent Powder just under the eye area, above the cheekbones. I blot this on until it's all white. At the time it looks silly, but I apply this due to the fact that a major problem in eyeshadow application is FALLDOWN! This is when the eyeshadow sprinkles onto the cheek as you're applying it onto the eyes. This can sometimes be because there is too much product on the brush or it could just be the nature of the eyeshadow! I find that a few Urban Decay eyeshadows from the Naked 2 palette do this! So the Kryolan Translucent Powder collects all of the excess eyeshadow, and you swoop it away when you're finished the eyeshadow, leaving a flawless skin.)

The eyeshadow:
INGLOT eyeshadow - Cream, Black (sorry, can't take them out of the palette to read the shades!)
Faces eyeshadow - 40, 32
As always, I applied Urban Decay Eye Potion Primer all over the eyelid, before applying the cream shade from INGLOT. I would of course take it out of it's magnetic palette to tell you the exact shade, but last time I tried this it cracked, so I'm a bit scarred! It's a very light cream colour anyway! I applied this everywhere to really bring out the eyes. I then, with a little chissel brush applied Faces eyeshadow in '40', a bronze orange colour which really brings out blue eyes! I created a sideways 'V' effect on each eye, followed by a burgundy shade '32' from Faces, particularly along the corners eyes, along the 'V'. Followed by a matte black from INGLOT.

The eyeliner: MAC Pencil, INGLOT Gel Liner - #77
Sinead had warned me as soon as I began her makeup that she had a sty in her eye and recommended that I use her eyeliner to avoid cross-contamination. (Something VERY important in a Makeup Artist's life, a worst nightmare!) I wasn't sure that a sty could cause it, but it's better to be safe than sorry! I blended her MAC Pencil liner in a jet black (sorry, can't tell you the shade as it was hers and I didn't think to check) into the eyeshadow beneath the eyes with a No7 eyeliner blender! For the top, I used INGLOT Gel Liner in #77 and created a weeny wing.

The mascara: Rimmel London - Lash Accelerator - Black
The lashes were Sinead's own semi-permanent ones she had gotten previously!

The powder: MAC Studio Fix Powder - NC30, MAC Mineralize Skin Finish - Medium DeepI applied MAC Studio Fix Powder in NC30 lightly along the face. For contouring beneath the cheekbones, along the forehead, each side of the nose, the chin and the temples, I used Medium Deep in Skin Finish!

The blush: MAC Mineralize Blush - Dainty

The highlighter: MAC Cream Color Base - Pearl
MAC Mineralize Skin Finish - Soft & Gentle
I use MAC Cream Color Base ALL the time! Pearl is brilliant for that ultimate dewy look! It's thick and creamy, yet can be applied lightly with a large duo fibre brush! I topped it off with a bit of Soft & Gentle, a powdery foundation with a shimmery effect.

Lips: NYX Lip Pencil - Ever, MAC Lipstick - Myth, NYX Lipstick - Paparazzi
Enough said really! They all worked perfectly together and made her lips really pop out, topped off with a bitta MAC Clear Lipglass!

TO SUM IT UP...
  1. Smashbox Studio Finish Primer
  2. MAC Studio Fix Foundation - NC35
  3. MAC Conceal & Correct Palette - Light
  4. MAC Studio Fix Powder - NC30
  5. MAC Mineralize Skin Finish - Medium Deep
  6. Eyebrows: Faces Cosmetics Eyeshadow - 08
  7. INGLOT eyeshadow - Cream, Black
  8. Faces eyeshadow - 40, 32
  9. Rimmel London - Lash Accelerator - Black
  10. MAC Pencil
  11. INGLOT Gel Liner - #77
  12. MAC Mineralize Blush - Dainty
  13. MAC Cream Color Base - Pearl
  14. MAC Mineralize Skin Finish - Soft & Gentle
  15. NYX Lip Pencil - Ever
  16. MAC Lipstick - Myth
  17. NYX Lipstick - Paparazzi

Well I hope you all enjoyed this REALLY long, detailed blog post of this look and it wasn't too boring! I'm a really fast typer so typing a lot just comes naturally to me, and I want everybody to know the tips and tricks of the trade! I know that not a lot of Makeup Artists go into minor detail on their looks, so that's where I come in! Hope you enjoyed, and don't forget to follow my blog and like my page on Facebook (click here)! Martha xx