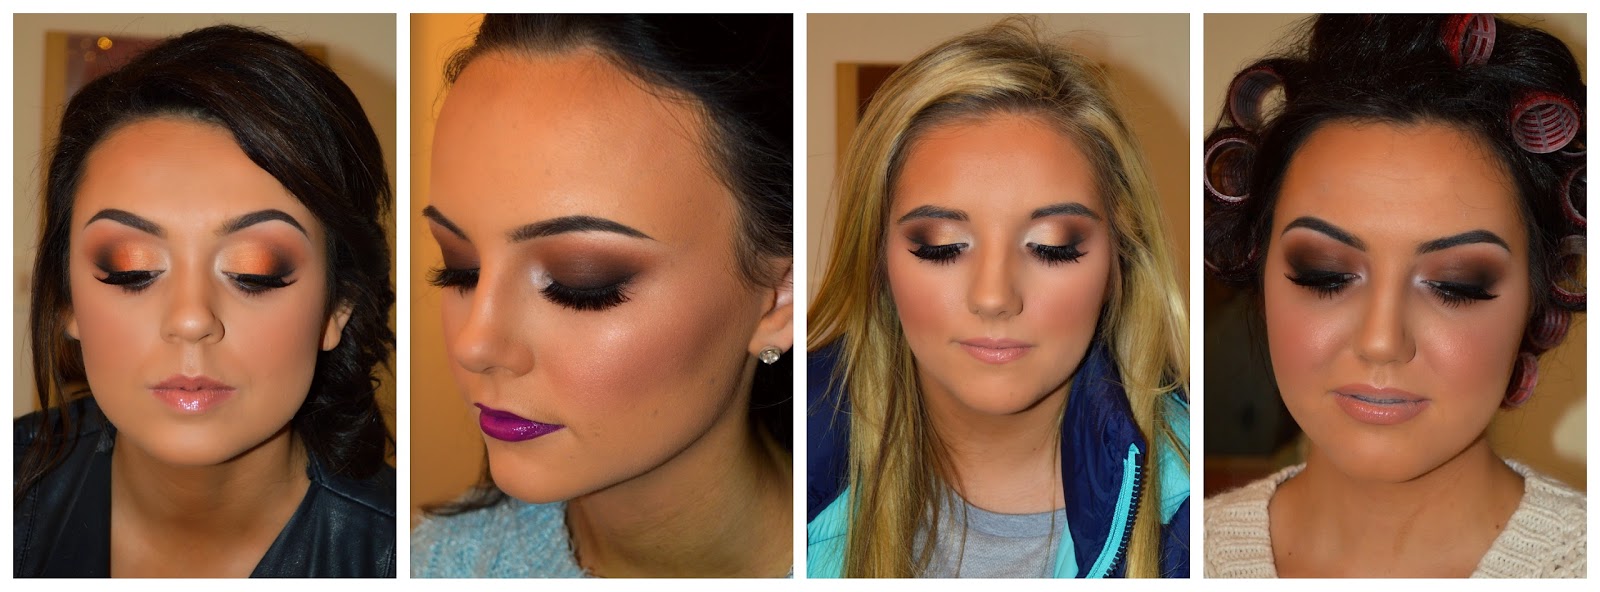
Monday, 23 February 2015

Green Eyed Girls: Best Colour Combos! ♥

Did you inherit the rarity that is green eyes? They're the most uncommon eye-colour in the world and absolutely gorgeous too. I love red hair and green eyes together. I receive a lot of emails from girls wondering what colours to use for green eyes. Unlike the blue-eyed beauties out there that have the right idea, my green eyed clients & fans (weird to say) seem to be at a loss and don't know what to go for next. It's not too difficult, really! Read on :)

The Theory
You're always supposed to refer to the colour wheel when choosing the perfect colour combination. Choosing a completely contrasting colour to the subject will make it pop! Have a look at the colour wheel to the right. See your eye colour? Now head to the opposite point of the wheel and choose that colour! As you can see, reds/pinks are shades that work for green.

So, what colours work for green eyes?

Don't be afraid to ease out of your brown and start playing with purple. Purples, pinks, coppers, cranberries & oranges are guaranteed to make your blue eyed pop. The contrasting red tones will illuminate that vibrant green colour! Try rose-gold or sparkly peach on the lid too. Gorgeous! To be on the safe side, read about what to avoid below!


What colours to avoid for green eyes?
Each to their own of course but technically you should avoid colours that are similar to your own. Greens will just over-power your eye colour (unless they're mega bright) and that's not what you want. Blues will also have the same effect. Basically, go for the right side of the colour wheel as your eye colour is based on the left! Try to avoid your gray, taupe, blue, navy and teal & lime shades. You need something to compliment your green eyes as opposed to over-powering them. Of course if you find that something else works for you, work away!


Martha's Top Picks for Green Eyes
MAC Cosmetics eyeshadows 'Cranberry, Coppering, Red Brick, Sketch, Deep Damson, Mythology, Phloof' €10
Urban Decay - Naked 3 Palette  'Dust, Burnout, Buzz' €18
Inglot eyeshadows '453, 335' €6
Sleek Sunset Palette €10Makeup Revolution 'Insomnia, Naive, Purple Haven, Candy Frosted, U Know U Want To, Rave All Night ' £1

So for green eyes, the contrasting colours are red & pink. In saying that, you shouldn't restrict yourself to them. Makeup is all about experimenting, being creative and feeling good about yourself. You can't do that using the same colour every single day, but it definitely flatters to use them. And trust me, they will pop! Of course there are girls with naturally bright eyes that no matter what they do, any colour will work - (luckyyy). Always experiment with your own makeup and even try out the 'no-go' shades to see what works for you. Makeup isn't black and white. If it was it sure would be a lot easier though! Do what works for you and makes you feel good.

I hope this post was helpful for you green eyed girls out there. Let me know what you think and even better, let me know how you get on with the experiment!
Thanks for reading!
Martha xx

Tuesday, 17 February 2015

Picking The Right Makeup Course? ♥


Makeup Artistry is an ever-growing business and it seems every second person is enrolling in night classes, full-time courses or trying their best to make it freelance. With it being such a popular industry it can be hard to know what course is right for you. I recently did a blog-post explaining what course I took and how I got on. You seemed to love it! You can read that here :)

There are many questions to ask yourself and the course providers when choosing the correct one. With full & part-time courses, workshops, masterclasses, there is so much choice and almost too much to choose from. Hopefully this post will make choosing the right course a little easier for you and hoosh you along in the right direction!


Ask Yourself: Why am I doing a Makeup Course?
That might sound like a silly question. 'To do makeup, duh!' But really, you need to know what your expectations are when you finish in order to know which course is right for you. 
Is the course best suited for..
  • Makeup Counters?
  • Freelance?
  • TV & Film?
  • Theatre?
  • Fashion Shows/Photo Shoots?
  • Special Effects?
  • Your own makeup?
  • Just for fun?
These are all questions that will probably need to be answered in order to choose the right course. Of course you can head into a course and see where it takes you. A lot of the time you'll set your mind to one thing and down the line will prefer another. That is totally okay and all a part of the journey, but the reason you should have an idea is to find the right course that specializes in that area. Short courses, workshops and masterclasses are ideal for those learning how to perfect their own makeup.

Qualifications
If you want to pursue life as a professional Makeup Artist post-study then you'll need a course that supplies the qualifications. There are tonnes of Makeup Artists out there and many of them are in fact self-taught, but you will rate a lot higher in the job-market and for clientele once you have the qualifications. This shows the client that your work is up to a certain standard. Some well known qualifications both nationally and internationally include CIBTAC, BABTAC, CIDESCO & ITEC. These are just a few of the qualifications professionals have in their back-pocket. Courses will brag about the qualifications that they provide, so if you can't see them mention one on their website, it's unlikely that one is given!

Certificates
Some courses don't offer qualifications and provide a certificate of attendance with the company's name included. Generally speaking, these are for the shorter courses based on attendance rather than exams. These certificates aren't recognized internationally. The courses without any qualifications would be best-fitted for somebody learning to perfect their own makeup as it would be harder to gain a job with no qualifications and therefore no set standard to comply with.

How Long is the Course?
This is something you definitely need to know before you commit to a makeup course. With the finances involved, you don't want to waste your money if you don't have the time to be there, so make sure it fits around your schedule. Across Ireland there are now dozens of part-time makeup courses, Some popular ones would include Make Up Forever, VanityX, LA College of Creative Arts and MFK Institute. 

Full-time courses are no doubt the best way to get as much information in as possible. They are normally a 5-day weekly commitment and require a lot of work. These are intended for students to work in the industry. Some popular ones would include Blackrock College of Further Education & Portobello Institute. To help your search, try Qualifax.

Course Fee
Most courses have hidden costs that go beyond the makeup provided. Things like portfolio materials, petrol/travel cost, one day training courses, exam fees, government levys etc. can cost a huge sum of money. This can (unfortunately) be the ultimate decider about choosing the right course, so make sure you've weighed out the payment and that nobody tries to rip you off! Be very skeptical of a lengthy part-time or full-time course to be paid cash-in-hand. You need a professional company, after all.

What are the Core Subjects?
Before enrolling in a course, you should know the core subjects of what you'll be learning. Don't join a course that has a brief description about what they offer all merged into one paragraph. You should be able to read all about the subjects offered in a clear bullet point format on their website. This is a great way to see if a company appears reputable and also if the subjects tickle your fancy!

Company
You need to know that the company you're doing your course with are reputable, professional and experienced. When considering a professional makeup course, ask them questions like...
  • How long have you been teaching makeup courses?
  • What is your success rate of students securing jobs?
  • Can I visit your premises & watch students at work?
  • Do you have references & testimonials from previous students?
  • Do you have photos of previous students work?
  • What are your terms & conditions?
  • Is there a minimum attendance required to pass?
  • Who is the instructor? Can I see their work?
  • What are your hygiene standards?
  • What is the practical - theory ratio?
That is only a small list of possible questions. A company that seems shy to answer any of those questions is unlikely to be confident in their courses and I'd advise to look elsewhere. 
Read more about what to avoid below!

What to Avoid
Avoid a course that doesn't display a course syllabus. A course that claims to be 'amazing' in the description is already appearing unprofessional. Companies that say their course will enable you to become a professional Makeup Artist but don't provide the qualifications are a no-no! They can't offer you something that they don't provide. Avoid courses that say they're training you to become a professional Makeup Artist but are also perfect for those applying their own makeup. Things like this contradict themselves as professional training is way too extensive for somebody learning how to apply their own makeup.

Workshops
Normally a one-day affair, workshops are intensive classes put together by a Makeup Artist with the purpose of helping you practice. The Makeup Artist will normally demonstrate a makeup look or talk you through your syllabus before letting you practice and guiding you along the way. This is ideal for somebody wanting to apply their own makeup correctly. 

Masterclasses

Masterclasses are a great way to learn new techniques that you may not have learned during your course. They're normally a one-day course taught by industry professionals letting you in on their tricks of the trade. Some say that these can be the most influential for those who are wanting to up their skill and learn new things. Therefore, masterclasses are often filled with both beginners and professionals in attendance. My upcoming masterclasses include a collaboration with From Matte to Metallic - March 18th, an Arabic-Inspired smokey eye class with Make Up Atelier Paris - March 25th & an exclusive Waterford masterclass, March 29th! Details on that here!

So my advice would be to apply for a full-time/lengthy part-time professional course that provide qualifications in order to work in the industry. To learn how to perfect your own makeup; do short courses, workshops and attend as many masterclasses as possible. This will also help build your skill as a professional once you've completed your course. As a professional or amateur you will realize that practice makes perfect and there is a lot that these courses don't teach you! 

I hope this post has made it a little clearer about what course is right for you. If so, please let me know! Or if you think there's anything I missed out on let me know that too! I can't begin to count the amount of times I typed the word 'course' Hahaha! Martha x

Tuesday, 10 February 2015

Martha Ryan - Makeup Artist: How It All Started ♥

I receive a lot of messages from young girls still in school wondering what course I did to pursue Makeup Artistry, if I'm self-taught or how I started freelance. I do answer each of these girls in detail but for a more in-depth answer, I thought I'd feature a blog-post explaining it all from then to now!

Me doing one of my first Debs clients, August 2012


I don't consider myself massively successful, this is only the beginning and I have a lot of work to do. But I do appreciate the fact that I'm a self-employed almost 21 year old running my own business 7 days a week, maybe 6 if you exclude my lazy Sundays ;) Ha! For that I feel is an achievement in itself. I'm not very materialistic, into designer brands or expensive jewelry. I work for happiness and always will. I feel that these are the extremely early days of my career and hopefully will be updating this blog-post in years to come, looking back on what was.


I did my Leaving Cert at 16. I was always the youngest of my class and by the time I finished school I was the youngest of my year and even the year below me! I couldn't wait to get out and start my life. My options had always been Interior Design, Fine Arts, Animation or Makeup Artistry. I've always been a creative person and wouldn't ever do anything else. I'd rather live on kidney beans in an alley doing what I love than pursuing a well paid 9-5 job I wasn't happy in. (haha kidney beans in an alley?) Anyway, I figured I'd shoot with Makeup Artistry for a year and see how it went. If I felt I wanted more, I'd do a different art-based course afterward. 

(A few sketches I did while in school to the left)

It was around October of sixth year when I applied for 'Theatrical & Media Makeup Artistry' in Senior College Dun Laoghaire. The course runs from September - May and is full-time. I did a lot of online research on www.qualifax.ie and figured it was the best one out there. Because I was only 16, my mum took students to pay for my course as I couldn't even get a job at that stage. The kit itself was around the €2000 mark - so serious commitment and saving is needed.

Makeup that Michelle
Regazzoli did for Debs '10
A lot of successful Artists I know studied there such as Little Kiva, The Make Up Fairy & Michelle Regazzoli-Stone. My final push to apply was when I got my makeup done for a Debs by Michelle Regazzoli herself.
She told me that she studied there and I knew how brilliant she was. 

To ensure a place in the course, you have to apply on the very first day as there is such a high demand. When I attended, I heard there were over 500 applicants a year to a 90 student course. As Makeup Artistry is on the up & up, I'd imagine it's even more so now. There were some absolutely brilliant girls in my class. Some had the talent, some had the creativity. I felt that I ranked a lot lower than them and wouldn't have the utmost confidence as I'd compare myself to my super creative friends, everybody older of course. Still, I found it a great way to make some life-long friends. You may even know some of my college friends - Jessica - MakeUp, SD Makeup, Clara Salinger Makeup to name a few!

When everybody thinks of courses in Makeup Artistry, they think "that must be easy enough", right? I thought the same. Before the course commenced we were called for a group interview and the year-head literally said that "If you think it's going to be all lipstick and eyeshadow, leave now!" No, she really did. She went on about how hard it was going to be and that they have a huge drop-out rate. I was committed so I happily nodded along. Boy, was she correct. The course was nothing like I expected. For an hour on each Thursday & Friday morning we got the chance to practice.
The rest was all theory, science, retail selling, skin-care etc. 

A sample of my makeup portfolios at the time
Every week we had a new exam from the get-go as well as our final exams in May. The continuous exams were recorded in our 2 portfolios 'Media' (SFX) & 'Fashion & Photographic' that we had to build up throughout the year. Every night I would go home and spend hours working on it. For each look we had to include an introduction to it explaining why you chose it, a mood board of ideas surrounding it, before & after photos, a client consultation form, a step-by-step, a face-chart, product list and of course the look in question. We had dozens of these to do. I was delighted to see the back of Harvey Norman's printers by May!

Then came the boring stuff, in my opinion. I liked biology but the classes and notes were too detailed and the tests were just like school. There was also retail selling which we had to do projects for, business studies and skin-care. We had weekly and final exams in all of these subjects. Skin-care required it's own portfolio filled with case studies of our friends and families skin. A4 pages describing skin-types! We had to analyze faces on a weekly basis, writing down their imperfections and listing why they had them & what natural ingredients could help them. Knowing alcohol levels in products I was never going to use, explain accompanying skin-type symptoms and knowing all of the technical names was just something I didn't care much for. I found this subject the hardest, despite receiving the weekly facials and shoulder massages in class ;)

My body-painting model for end of year show
In the midst of the madness, they brought us to different workshops - nails, henna, tanning, special effects and more. We also did an end of the year show, showcasing body-painting. For that reason, it really is a great course to get you as many qualifications & experiences as possible. I'm qualified in things I can't even remember at this stage. Something everybody agreed on at the time was that it really did need to be a 2 year course with all of the work required by us.

1 year, 3 portfolios, many tears, laughs and multiple qualifications later, I finally finished and passed. I found out my results on holidays and literally cried all day with relief. My hard work had paid off! I was eager to start life in the real world. Unfortunately, the real world wasn't as ready for me as I anticipated. Something people don't necessarily tell you in training is how difficult it is to find a job afterward. I applied to every single makeup counter in Dublin that would take my CV. The truth is, no matter how brilliant you are at makeup or how creative you are, you need retail experience and that's a fact. To work at a makeup counter is just a retail job in a certain sector, as opposed to applying makeup all day, unfortunately. 

Finally when I was 18 I decided to suck it up and gain some retail experience so I could pursue life on the counters. I worked at Dunnes Stores from roughly December '12 - February '13. Before that, I had done a few nixers here and there but nothing steady and my skill definitely wasn't up to scratch. While working, I took a break from Makeup Artistry. I became ill in February and took three months sick-leave before handing in my notice in May. Knowing I had the stress of work at the back of my head all the time wasn't helping my illness or recovery. Finally, June came and I got a text from a local girl asking to do her & her mums makeup. I hadn't worked properly in months, only a job here and there if I was up to it but nothing serious. I did her makeup and it gave me the satisfaction I'd been missing the past few months. I feel as though I need to make a difference to feel happy.
Working at a cash register certainly didn't fulfill that in the past like doing somebody's makeup did.


One person would get their makeup done and tell several people about it. Suddenly my calendars were starting to fill and eventually I was too busy to look for work, too busy for something part-time, too busy for anything else other than makeup. My life started to become clearer and the satisfaction I got from peoples reactions was an explosive feeling of joy. With all of the practice I was getting my skill started to improve & I started to learn new techniques. With every client that mentioned she likes things a certain way I started to think 'Your way works too! No, your way works better!' All of a sudden I was learning things from making mistakes, learning things from trying new things and it all came down to practice. My dreams of working for myself full-time were becoming a reality. I registered as self employed and suddenly opportunities were hitting me up left, right and centre. Clients would need their makeup done for TV appearances, newspapers and brides would put all of their faith in me. People were starting to know my name and my work.
This is something I never expected.


Overall, I believe that practice has gotten me to where I am today. I did the course, I have the qualifications, I learned the rules, but only when I was left to my own devices did I improve. It didn't happen after one video I watched, one experience I had or any one thing at all. Every day I was improving and didn't even see it until I compared my work side-by-side.

The first photo - September 2012. The second photo - December 2013

Now I have 13,000+ people on my Facebook page, 5,000+ on my Instagram and I couldn't be more grateful. I still have days that I compare myself to every other Makeup Artist out there and wonder what they're doing better than me and how I can be more like them, but that wouldn't be me. Everybody's going in different paths and I need to learn to trust my journey! Sometimes I get butterflies imagining what life holds 5, 10, 20 years down the line. And it's all thanks to my lovely supporters that keep me ticking over! 

Senior College Dun Laoghaire is now Blackrock College of Further Education and the course layout and qualifications have changed slightly. I only mentioned my course in the post as that's in relation to me, but I think I'll feature another blog-post about picking the right makeup course. I don't want to be bias and want you to explore all of your options, because what works for me may not work for you.
Everybody's different! :)

Thanks for reading! Martha xx

Tuesday, 20 January 2015

Blue Eyed Beauties - Best Colour Combos! ♥


Do you have blue eyes, like myself?
I really love working on blue eyed girls and find that it can be the brightest eye colour that just POPS like no other! I've heard a lot of mixed opinions on colours to suit blue eyes but I disagree with a few that would include gray, blues and taupes. Cooler colours are a no-no, in my opinion.


The Theory
You're always supposed to refer to the colour wheel when choosing the perfect colour combination. Choosing a completely contrasting colour to the subject will make it pop! Have a look at the colour wheel to the right. See your eye colour? Now head to the opposite point of the wheel and choose that colour! As you can see, orange shades will work for blues.

So, what colours work for blue eyes?

Tones that ease into the warmer side of life. Orange, copper, bronze, red, gold, beige, toasty browns & creams are always a great starting point! They completely flatter blue eyes and allow your eyes to shine. I find that peach, corals & pinks are gorgeous for blue eyed beauties too. Purples can work as long as they ease towards cranberry and steer away from navy and blues. Read more about what to avoid below!

What colours to avoid for blue eyes?
Speaking on a strictly technical basis, anything that is cool should be avoided. This would be your gray, silver, taupe, blues and navy shades. Your blue eyes are a perfectly cool colour themselves and need something to compliment them, not over-power them.

Martha's Top Picks for Blue Eyes
MAC Cosmetics eyeshadows 'Orange, Red Brick, Coppering, Nylon, Cranberry, Amber Lights' €10
Urban Decay eyeshadow 'Half Baked' €18
Inglot eyeshadows '335, 51, 65, 407' €6
Sleek Sunset Palette €10Makeup Revolution 'Mountains of Gold, Naive, So Good To Me, Touch Me, I Want U' £1

So for blue eyes, the contrasting colour is orange. In saying that, you shouldn't restrict yourself to that colour. Makeup is all about experimenting, being creative and feeling good about yourself. You can't do that using the same colour every single day, but it definitely flatters. And trust me, it works! Of course there are girls with naturally bright eyes that no matter what they do, any colour will work - (luckyyy). Always experiment with your own makeup and even try out the 'no-go' shades to see what works for you. Makeup isn't black and white. If it was it sure would be a lot easier though! Do what works for you and makes you feel good.

Remember - it's all about contrast. To make black stand out, you'd wear white, right?
Comment below if you'd like me to do more colours!


I hope this helps! Martha xx

Monday, 12 January 2015

Kim Kardashian Inspired Makeup & Product List! ♥

As we eased into December, so did our darker trends. Whether it be your clothing, hair or makeup, everybody wants to go just a little more dramatic during the chilly time of year. Dark lips have, and I think, always will be huge in the makeup world for Autumn/Winter, but a dark eye never loses luster!

Recently I demonstrated a Kim Kardashian inspired look on model Orla. Throughout the following week, almost all of my clients were bringing in that photo and asking me to recreate it for their nights out, so I've had a lot of practice at this stage! Not only am I going to list all of the products used, how to use them but I've also linked as to where you can buy everything! Eeekk!
Don't hate me if you're poor after this! x


The eyes are a mixture of brown & black with a gorgeous burnt copper tone in the background to add a little more depth. The skin; extremely contoured and a matte finish. The brows; bold and defined. The lips; matte and nude. I'll start with a product list and then I'll delve into how I used each product beneath it (+ links to each item)!

Product List
FACE -
Smashbox Photo Finish Primer 
MAC Cosmetics Studio Fix Fluid NC40
MAC Cosmetics Pro Longwear Concealer NW15
MAC Cosmetics Studio Fix Powder NC40
Anastasia Beverly Hills Contour Palette 'Banana'
MAC Cosmetics Mineralize Skin Finish 'Medium Deep'
Sleek Contour Palette 'Medium'
MAC Cosmetics Blush 'Peaches'
MAC Cosmetics Mineralize Skin Finish 'Lightscapade'
MAC Cosmetics Fix + Spray

EYES -
Urban Decay Eye Primer Potion 
MAC Cosmetics Eyeshadows
 'Gesso', 'Blanc Type', 'Orange', 'Red Brick', 'Swiss Chocolate', 'Folie', 'Embark'
Inglot Eyeshadow '335', '63'
Inglot Gel Eyeliner '77'
Inglot Duraline
MAC Cosmetics Eyeliner pencil 'Feline'
Rimmel London Mascara 'Lash Accelerator'
Ardell Lashes '117'
Duo Glue

BROWS -
Anastasia Beverly Hills Brow Powder 'Dark Brown' & 'Ebony' 
MAC Cosmetics Fluidline 'Dipdown'
Inglot Duraline
MAC Cosmetics Correct & Conceal Palette 'Light'

LIPS -
MAC Cosmetics Lipliner 'Boldly Bare'
MAC Cosmetics Lipstick 'Honey Love' & 'Myth'


Details & How To -

Prep

So to begin, I prepped the skin with my Smashbox Photo Finish primer all over the face, about a pea-sized amount. This allows the foundation to glide on effortlessly and takes away any shine that was naturally on the face. I then applied a full amount of Studio Fix Fluid foundation all over the face to rid my model of any blemishes. I used the same brush for both - Crownbrush C427. 

Brows
Next, the brows! I used a thick angled brush throughout my models eyebrows & created the shape I wanted using my brow powder. This never defines or darkens them as much as I need, so I then went over them with my Fluidline from MAC. To make the Fluidline glide on easily, I used a few drops of 'Duraline' and mixed it around with a thin angled brush until I was happy with the moist consistency. I then went beneath the brows from the outter half underneath the arch all the way to the edge of the brow with my angled brush. The trick to building up the definition is to apply it slowly. Then I filled in the upper half of the arch with my Fluidline also. Instead of applying it throughout the entire brow, I used a disposible mascara wand to blend the product through the brows. The next step I took was grabbing a flat brush for concealer. I put a little bit of the original foundation on the brush and defined the upper part of the brow by going along the edges with it. This makes for a perfectly defined brow. I then took the same step for beneath the brows, except with a light coloured concealer.


Eyes
When the brows were finished, I applied concealer all over the eyelid before adding my eyeshadow primer. I then dabbed my 'Blanc Type' eyeshadow all over the lid, all the way up to the brow, using a flat brush ideal for 'dabbing'. I used that same brush to pop Inglot '335' eyeshadow all over the eyelid, up to the socket. I prefer to apply the product then blend it afterwards. On top of that, I added 'Swiss Chocolate' & 'Folie'. Finally, I blended with my Nichola brush with no product on it up into the crease and towards the brow bone, making everything even. I then added my Inglot eyeliner and put it all over the lash line without a wing. I used a '263' brush from MAC. 

Using AYU's crease brush I took MAC's 'Embark' and Inglot's '63' and buffed it into the lash line and the liner, allowing the darkest colour to appear as close to the eye as possible. When that was blended in sufficiently, I used my MAC 'Red Brick' & 'Orange' on a fluffy brush and blended lightly into the socket and up towards the brow bone. I took the same steps beneath the eyes - I used a big brush for the lighter colours and used a chissel brush for the dark
brown and black (63 & Embark'). I then added my eyeliner pencil. 

For the highlighter, I used MAC's 'Gesso' on an angled brush beneath the eyebrow and in the inner corner of the eye, making an almost blue-grey colour. I then took my '117' eyelashes and added a little bit of Duo Glue'. I waited about 30 seconds before popping them onto the eye.

Face
Now that the eyes are finished, I completed the skin. I popped some Pro Longwear concealer beneath the eyes, added my Studio Fix powder, along with my Anastasia 'Banana' colour beneath the eyes. With an angled brush I used 'Medium Deep' to warm the edges of the face - the temples, cheekbones, chin, nose, jawline, forehead and neck. To make a really deep contour I also used my Sleek palette. Then I went in with a matte peach blush from MAC 'Peaches'. On top of the cheekbones, nose and cupids bow I then used a stipple brush to apply my 'Lightscapade'. The lips were simply done using 'Boldly Bare' lipliner, 'Honey Love' & 'Myth' lippy. I then finished the look with 2 or 3 sprays of my 'Fix +'

I hope this was helpful! Happy shopping & don't forget to show me your recreations! Martha xx

Wednesday, 7 January 2015

AYU Makeup - Bargain Buys REVIEW! ♥


Hey guys, welcome back to my blog! Today I'm gonna chat a bit about AYU Makeup and the products it has to offer. I was sent some absolutely lovely things by owner Suzanne and I've been loving them ever since. Before I delve into each product, I gotta let you know about AYU itself. The line was set up by a Makeup Artist herself, working in the industry for over ten years, so you know it's going to be good. They are cruelty free (yay, my favourite!), top quality and not going to break the bank. Suzanne has told me herself that no matter how many times they've been told to 'up' the prices, they're determined to keep their prices affordable for everybody, beginners and industry professionals alike. They are big into education and knowing how to use their products correctly, so with every purchase you'll also receive a little 'How To' leaflet to maximize your experience!

Contour palette, Foundation Brush & 4 Eye Brushes
                                  
     Foundation Brush

These Kabuki style foundation brushes are really big on the market right now. 
If you've read any of my past reviews or follow me on Facebook you'll already know that these are my favourite kind. The soft bristles at the top of the brush mean the foundation really does glide on without any harsh streaks and feels so soft on the face. This brush is identical to some of the top-quality brushes out there at only a fraction of the price. Bargain central!
Retails at €10.50


Eye Shadow Brush
As many pro-blenders and fluffy contraptions there are on the market now, everybody still needs a basic applicator brush. I use these flat brushes to apply a base colour all over the lid. It's also a great one for dabbing on pigments and glitters to the lid. At such a small price, it should be a staple in everybody's makeup collection. Photo on right. 
Retails at €4.50


                                                  Pro Blender Brush 
This does exactly what it says on the tin. In order to have a complete makeup brush collection, you need a few blenders. This one is perfect. It has thick bristles which means you're still left with a great element of control. It is mostly a flat brush but not thin, so perfect for blending. These are my favourite type of blending brushes and I have wayyy too many, I think we're heading into double digits at this stage. Bottom photo shows it turned to the side to see the width. Retails at €4.50


                                  Eye Shadow Blender Brush
Another breed of blender, the super fluffy for maximum blending. This is perfect for blending a subtle colour into the socket of your eyes on your 'no makeup' days, am I right? It's also a great one for going over the edges of a smokey eye. Apply no product to the brush and just blend along the outside of your already applied eyeshadow. This will eliminate any noticeable lines and make for a super blended look.
Retails at €4.50


                   Crease Brush 
Every makeup fanatic is aware of crease brushes. They're tiny little firm brushes made for applying product into the socket/crease of your eyelid. It's super small, skinny and firm so you have so much control over what you're doing and how much product you're applying. These brushes will provide a straight line in your crease which can also be blended out with the 'Pro Blender' brush. These are also great little tools for smudging out eyeliner on both the top and bottom lid. I have about 15 of these little guys. I know, I have an obsession!
Retails at €4.00


Contour Palette
If you're a makeup enthusiast, then I'm sure you're already well aware of the art of contouring and all that it brings. There are hundreds if not thousands or 'How To' contour videos online, all over Youtube. Ever since Kim Kardashian shared her contouring secrets by her Makeup Artist Mario Dedivanoc the world has just gone crazy! There are two types of contouring - cream & powder. I offer powder contour to my clients but it's always fun to experiment with cream contouring too!

On the left, I've attached a photo of not only the contour palette but a little guide to go along with it. 

Starting from the left column, there are 2 corrective colours to disguise different coloured bags beneath the eyes. Above them is a highlighter for the cheekbones etc.

Contouring on model using the AYU Contour Palette
In the next column, we have our highlight colours. This slowly transitions to our bronze colours and eventually our shading for contour. If you haven't learned how to contour yet, you need to! It will change your life. To learn how to contour, click here for a guide that I created a while ago!


I tested out the palette for myself using the colours and the guide I showed you & this was the result. There's a lot of mixed reviews about the preference between cream and powder contouring, but it's up to you to experiment and decide yourself! 
Retails at €15.00


There you have it, my review of the excellent value AYU Makeup. Throughout the review when I was referring to the prices, I was actually in awe over their affordable price. This would be perfect for somebody starting out their makeup collection and doesn't have the means to spend hundreds on a few great brushes. I hope you enjoyed my review & that it was helpful for you! Don't forget to 'like' AYU on Facebook here, With over 16,000 likes they've already made their mark in the Irish industry!
See you soon! Love Martha xx


Monday, 5 January 2015

Lip Voltage REVIEW - Injection Free Plumping! ♥


Hey guys,
I'm sure most of you are aware of the number one lip plumping product on the market right now, that is 'Lip Voltage'. I've heard many mixed reviews and decided it's finally time to try it out for myself to see what the fuss is all about, and if it works for me. I received it months ago, but between a busy schedule and being repeatedly sick, my lips just haven't had the time to be beautified until now!

So, what is Lip Voltage?
Lip Voltage is by the company 'Dreamweave & Co.' It's a fast absorbing non-permanent peptide & collagen lip treatment that allows blood flow to the lips and gives them a bigger appearance. It lasts approximately 24 hours after application, so you don't have to be afraid of long term effects.

There's no clinic, no needles and no hefty price tag! 

How do you use it?
Always read the instructions properly when trying out a new product
Upon appearance, it looks like and holds like an average lip-gloss. As well as the gloss, comes 'Mix Up The Voltage' which allows you to customize your plumping effect and give it a turbo boost. Adding 1 drop will create low voltage, whereas adding 3 (max) will create the hottest & highest voltage. 'Mix Up The Voltage' comes in a little non-needle syringe, just for measuring out your amount of product. When applying the drops, dab the lip wand in and out of the tube for about one minute to ensure that the product is well & truly mixed around. Then apply!


Application
I noticed a defined lip line upon application
I used .15ml as I wasn't sure what my lips could take. I applied the product at 2:35pm and decided to note the effects minute by minute. I applied an even layer on both my top & bottom lip. 2 minutes later I felt a slight fuzziness in my top lip. By the time 5 minutes had passed my top lip was still the only fuzzy slightly warm feeling, so I decided to apply another layer to the bottom as it wasn't feeling anything. At 2:45pm my top lip started feeling super 
tingly and slightly hot. Still, my bottom lip didn't feel a thing so I decided to apply a third layer. Finally, at 2:50pm (15 minutes after initial application) both of my lips felt tingly and hot but bareable. 


Suddenly, I noticed in the mirror that my top lip was noticeably plumper and more defined around the edges. At 3:00pm I took my final photographs. The hot buzzing feeling didn't die down and only intensified. I feel it may bother some people and others it wouldn't. I didn't mind it, especially given the effects. I feel that I could have had a super intensified test-run by using the maximum product, but I wasn't sure how much my lips could handle using it for the first time, so I'll be intrigued to mix up the voltage even more next time. 

Does it hurt?
From reading multiple reviews and hearing many opinions, I believe it's all about personal pain threshold. Some people experience a certain level of pain and uncomfort, whereas others don't feel it at all. Some actually like the sensation! Whether you feel pain or not, I think that everybody will experience a little tingle. The pain level generally depends on the amount of 'Mix Up The Voltage' you use. (.1 ml - mild. .2 ml - medium. .3 ml - hot.)

Why does it hurt? (if at all)
Upon mixing in your 'Mix Up The Voltage', it increases blood flow and opens pores so the product can truly work, mimicking the effect of chilli on the lips without irritating the skin. 

How much does Lip Voltage cost?
The average retail price in Ireland for 'Lip Voltage' is €35, so don't be fooled by more expensive price-tags! 

Where can I buy Lip Voltage?
Lisa Wallace Beauty, 22 South William Street. €35
There are many stockists in the UK but here in Ireland, the plumper isn't as readily available. It is always better to buy from a reputable company than to buy a knock-off product a little cheaper from the internet. As with cosmetics and perfume, there is always going to be fake products out there that claim to be the real deal, When in fact, you're better off knowing 100% what products you're using.


Concluding Opinion (Hello0o, does it work?)
Well, you tell me! I would say yes. I have heard a few mixed reviews about the product that is 'Lip Voltage' so as you can imagine I was dying to test it myself. I am actually very satisfied with the results. I find that when used correctly and with the right amount of product, it should work for you too. I guess you'll never know until you try it for yourself!

Before & After 'Lip Volage' - Slightly different angles. Top lip noticeably bigger
Well that's it guys! I hope my review has been helpful.
Here's an idea - hashtag #lipvoltage into Instagram to see more Before & Afters! What do you think about it? Did it work for you? Let me know in the comments! Don't forget to 'like' Lisa Wallace Beauty on Facebook here to keep up with offers & giveaways! Martha xx